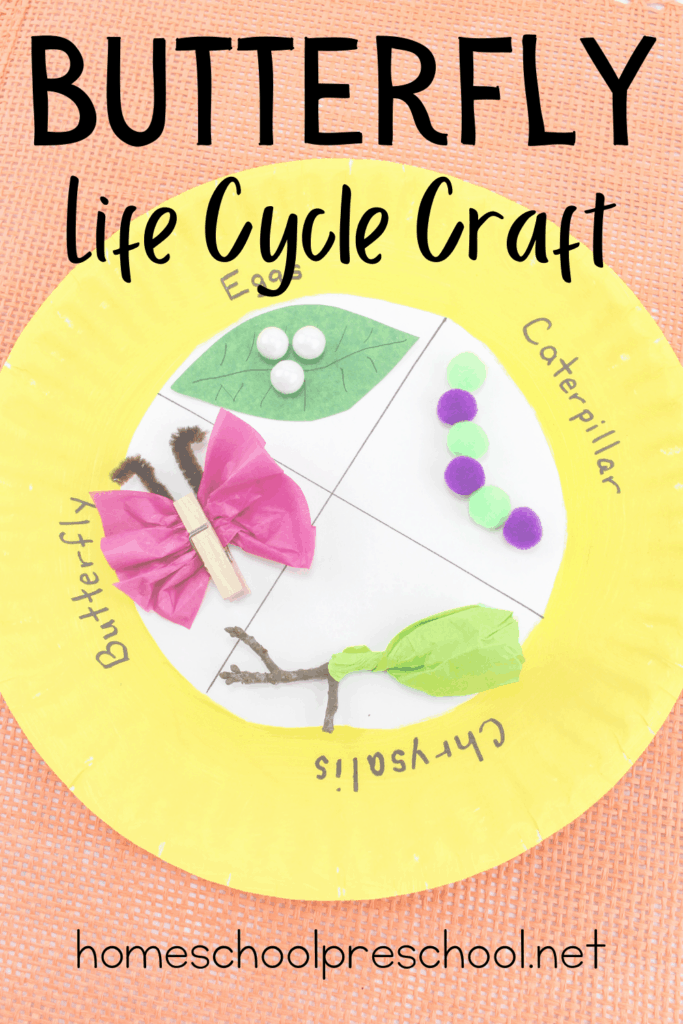
Life Cycle of a Butterfly Craft
Spring is a great time to learn about butterflies. This life cycle of a butterfly craft will help little ones see how caterpillars become butterflies.
Spring is one of my most favorite times of year. There is so much new life to explore with preschoolers.
From budding flowers to insects and more, you’ll never run out of spring ideas to do with your little ones.
All you need are a few simple items to get started. Then, you and your little naturalist can get started on this hands-on science activity for preschoolers.
Life Cycle of a Butterfly Craft
Don’t miss: 5 Ways to Celebrate Learn About Butterflies Day
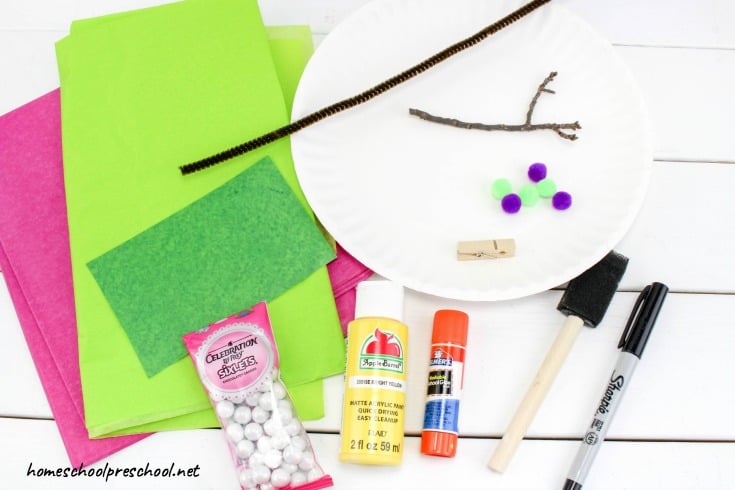
What You Need:
- 1 white paper plate
- yellow craft paint
- 1 brown pipe cleaner
- 1 mini clothespin
- 1 small stick (from outside)
- 6 mini pom poms
- green construction paper
- tissue paper, light green and pink
- 3 white Sixlets (small chocolate candies)
- glue stick
- black Sharpie
What You’ll Do:
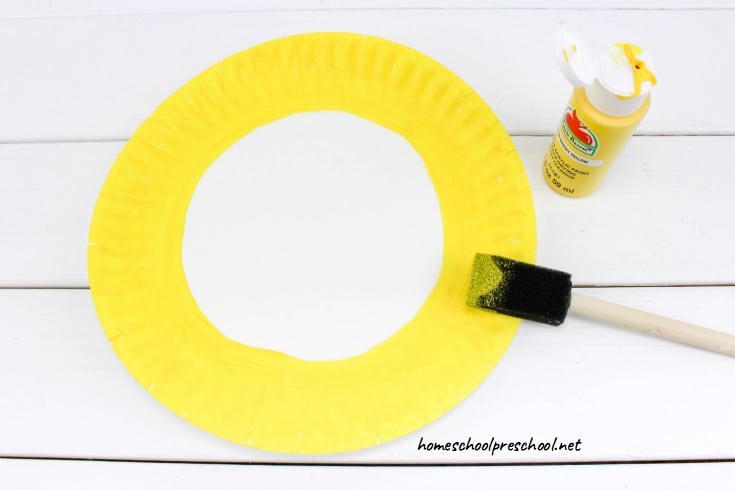
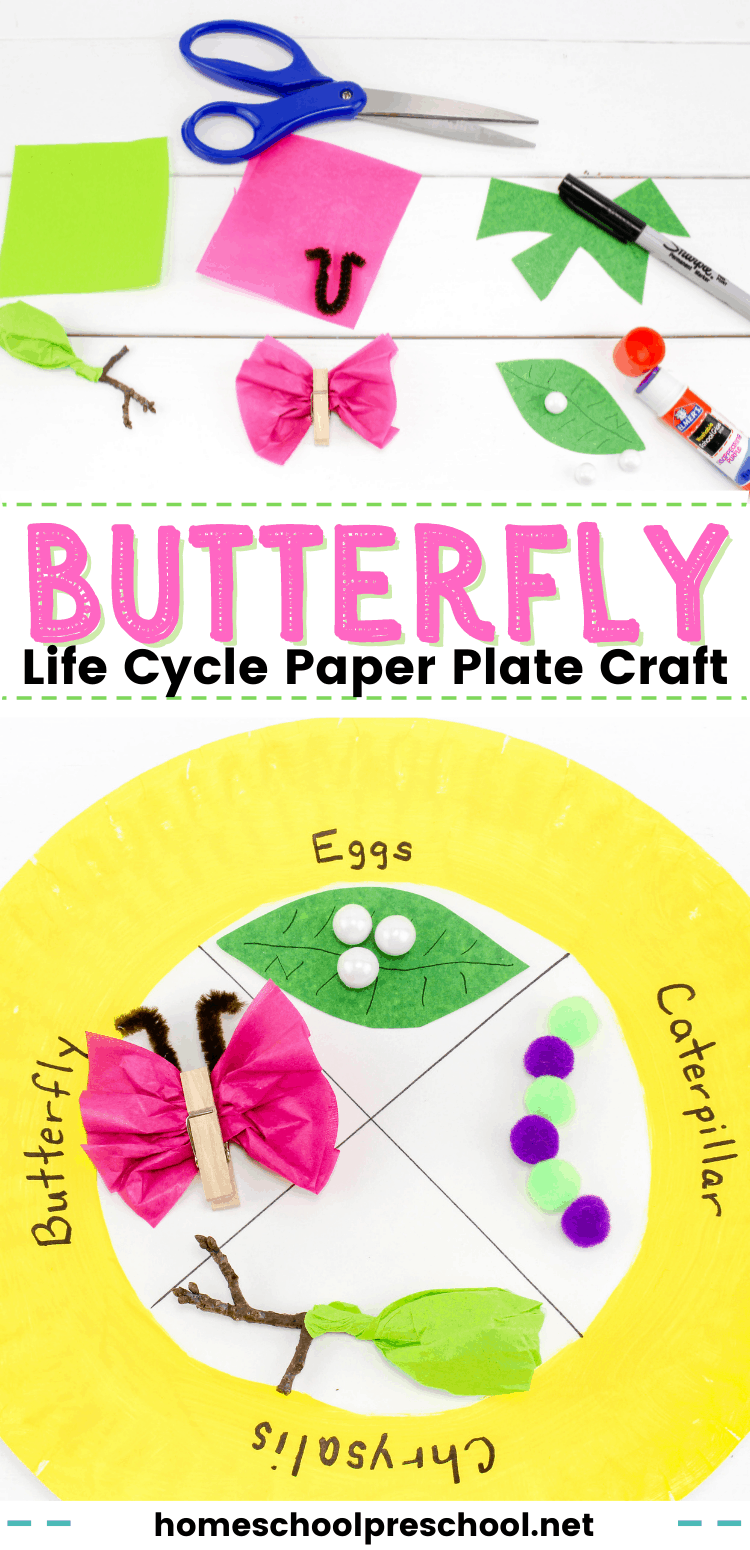
Paint the entire outer rim of the inside of the paper plate. Leave the middle part white for the life cycle parts. Let the paint dry.
For the chrysalis: Cut a small square of dark green tissue paper. Form it into a cocoon shape over one end of the stick. Twist it so it closes around the stick.
For the butterfly: Cut a small square of pink tissue paper. Pinch the tissue paper in the center to make it fan out on both ends. Clip the clothespin on the center to hold it in place. Make sure each side of the butterfly is even and the “wings” fan out.
Now, cut a small piece of the brown pipe cleaner. Fold it in half, and clip the clothespin to it so it resembles a butterfly’s antenna.
For the eggs: Cut out a small leaf from the light green tissue paper. Draw lines on it to resemble leaf veins. Glue a few Sixlets in the middle of the leaf.
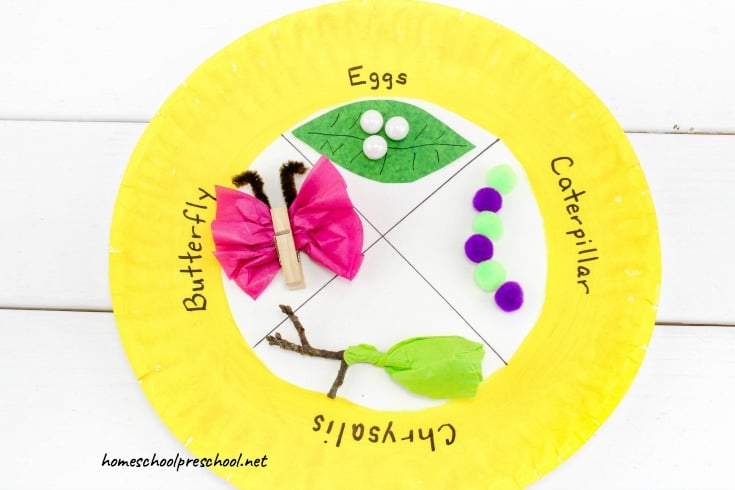
By this time, your plate should be dry. Draw a black “X” on the white flat part of the plate so you have four equal sections.
Glue the leaf onto one of the sections. Next to it, glue six mini pom poms so they resemble a caterpillar. Now, glue the cocoon onto the next section. Finally, add the butterfly to the last section.
Use the black marker to title each section of the life cycle: eggs, caterpillar, chrysalis, and butterfly.
This is a great craft for your spring life cycle activities. It’s also a fun hands-on way to teach sequencing. Have your preschoolers use this craft to explain the life cycle of a butterfly to someone else.
RESOURCES I LOVE
This wooden butterfly puzzle will promote hand-eye coordination, develop problem-solving skills and improve matching skills. In addition, it can stimulate a child’s imagination and creativity.
This beautiful butterfly lacing toy is great for practicing the sewing motion. Wooden Lacing boards are great for fine motor development and hand eye coordination.
Spring and summer are the best time of year to study butterflies. This printable features nine life cycle of a butterfly activities for early learners.

Tara is the brains behind Homeschool Preschool, where her journey from preschool and public school teacher to homeschooling mom of three fuels her passion for early childhood education. With a blend of expertise and firsthand experience, Tara’s writings offer practical tips and engaging resources to support families in creating meaningful learning adventures at home.
My daughter made this today. We have been doing several living thing life cycles but this turned out by far the cutest! Love your ideas.
This is a great craft for preschoolers! They will love learning about the life cycle of a butterfly!
Love